10 Common Oil Change Mistakes to Steer Clear of
If you do an oil change or have a shop to do it, your car might not get the TLC it needs. Anyone who has ever changed their car’s oil may have committed one of the below-listed mistakes at some point. So, now is the time to learn from and avoid those mistakes. Refer to the list below of the top ten mistakes to avoid during an oil change.
Not prepping for the oil change
When you go for a professional oil change service, everything necessary for completing the oil change is within arm’s reach from the bottom of the vehicle’s engine. Walking around to fetch things can waste a lot of time. So when you change your oil, it is better to be equipped with every tool needed during the oil change. Thus, before beginning, have everything readily available.
Not warming the engine
The oil does not flow well if cold. Hence, draining oil from the cold engine can take a while. Some of the oil would not drain out of the cold engine, which would have come off if the engine had been warmed. Thus, start the vehicle and let it run for five to ten minutes to reach its operating temperature.
Not keeping track of the mileage
You must change your oil after meeting one of the two conditions:
- After a specified number of miles
- After a decided number of months
Not tabbing the miles since the last oil change can cause trouble. You might be changing the oil too soon or too late (usually the latter), and both these situations can damage your engine. Please note that even if you get your oil changed at the garage, the professionals there might also forget to mark the mileage at which you got the oil change. Hence, it is imperative to pay attention to yourself to know when your last oil change was.
Not rotating the tires
Typically, the oil change schedule coincides with the tire manufacturers’ advised schedule for tire rotation. Ideally, it is between 5,000 and 10,000 miles. While rotating the tires at every oil change can be daunting, particularly if you have no lift, it helps them last longer as they wear evenly.
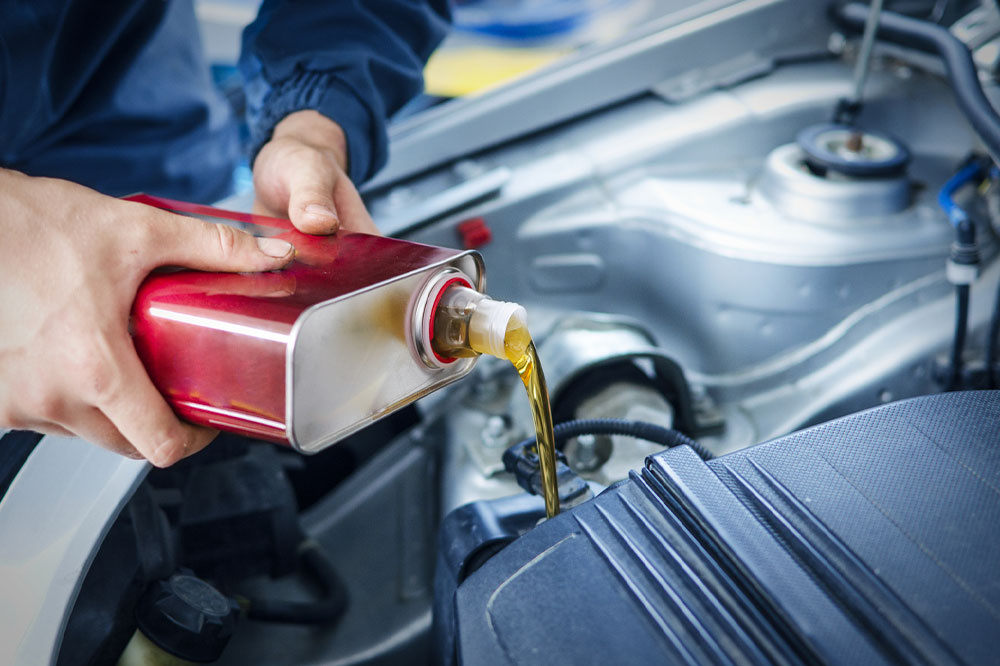
Not using the correct oil
Whether you take your vehicle to a lube shop or change your oil, never fill the engine with a cheap replacement. You must always use the manufacturer-suggested oil. Most people are reluctant to spend on superior quality oil as it is expensive, but not doing it can prove costly in the long run. Hence, always use the correct oil, irrespective of how much it costs.
Further, you must never use gasoline oil where diesel is needed, and vice versa. Picking only premium quality synthetic oil ensures better service and performance for the engine. It also aids in engine longevity. Hence, if you care for your vehicle, do not hesitate to spend extra on synthetic oil.
Choosing the incorrect oil filter
It is another most prevalent DIY oil change mistake. People tend to employ the wrong oil filter that is not sealed well. It has an impact on the oil pressure and results in oil leaks. If you fail to notice the oil leaks through the filter, you will drive an engine sans any oil, which almost always has a fatal consequence. So, always use a good-quality oil filter that fits properly.
Not changing the oil filter O-ring
As you change the oil filter, you must also replace the O-ring. While buying the oil filter, you will also get a complementary O-ring on the top of the filter that seals it. Usually, the O-ring wears out and breaks quickly. Hence, change out the O-ring with the filter cartridge.
While changing the O-ring, you must bear in mind the following things:
- Before tightening the filter, moistening the O-ring with a small amount of oil is recommended. Lubricating the O-ring allows it to withstand the initial torque applied while tightening the filter.
- Before taking the oil filter off, remove the old O-ring with it.
If you do not change the O-ring, it will blow out and break open the seal as you start the engine. Consequently, the engine will stall or leak. Sometimes, it may not happen instantly, but five-ten miles down the road, which can be relatively more dangerous.
Dropping the oil drain plug into the drain pain
It is usually easy, especially if your vehicle’s drain plug is hot. However, sometimes, it might not be because of the temperature being too high but because the plug is too small and tricky to grasp. A simple technique is to apply gentle pressure towards the drain pan while unscrewing it to ensure a firm grip on the drain plug. When you reach the final thread, you will sense the plug becoming loose, allowing you to remove it when you drain the oil effortlessly.
Overtightening the drain nut or filter
Some individuals tend to tighten or secure objects excessively, even when unnecessary. It suffices to tighten the clean new oil filter with one hand, as it is also easier to open it too (you will not have to employ a wrench, using your two hands will do the job).
As for the drain plug, 20-25 ft-lbs is adequate if it does not have a crush gasket. In plugs with crush washers, tighten to a slightly higher torque range of approximately 30 to 35 ft-lbs. Overtightening poses challenges when you have to remove the drain plug or filter.
Not adding the correct amount of oil or any oil per se
Your engine needs a specific amount of oil. So, after the new oil filter and the drain plug is in place, you must start pouring the specified amount of oil into the oil filler hole. The failure of most engines can be attributed to the oversight of mechanics neglecting this crucial step.